cd /root/

# imageをダウンロード
wget https://cloud-images.ubuntu.com/releases/24.04/release/ubuntu-24.04-server-cloudimg-amd64.img

# imageをマウント
guestmount -a ubuntu-24.04-server-cloudimg-amd64.img -i /mnt

# パスワード生成
openssl passwd -6 "password"

# config設定
vim /mnt/etc/cloud/cloud.cfg

# ---
# 13行目
ssh_pwauth: true

# 94行目
system_info:
  # This will affect which distro class gets used
  distro: ubuntu
  # Default user name + that default users groups (if added/used)
  default_user:
    name: ubuntu
    lock_passwd: False
    passwd: $6$/.VOMRR6AOzEF/wM$RRwAFUJcOSq4bNhUqLav6syQKpYjK.8VDjv8m1IyqebJ/cvursHxOGpAeYui59MAbnIAYmP7wTucshHM/iqal1

# ---

# アンマウント
umount /mnt

# create a new VM with VirtIO SCSI controller
qm create 9000 --memory 2048 --net0 virtio,bridge=vmbr0 --scsihw virtio-scsi-pci

# import the downloaded disk to the local-lvm storage, attaching it as a SCSI drive
qm set 9000 --scsi0 local-lvm:0,import-from=/root/ubuntu-24.04-server-cloudimg-amd64.img

# template化する
qm set 9000 --ide2 local-lvm:cloudinit
qm set 9000 --boot order=scsi0
qm set 9000 --serial0 socket --vga serial0
qm template 9000
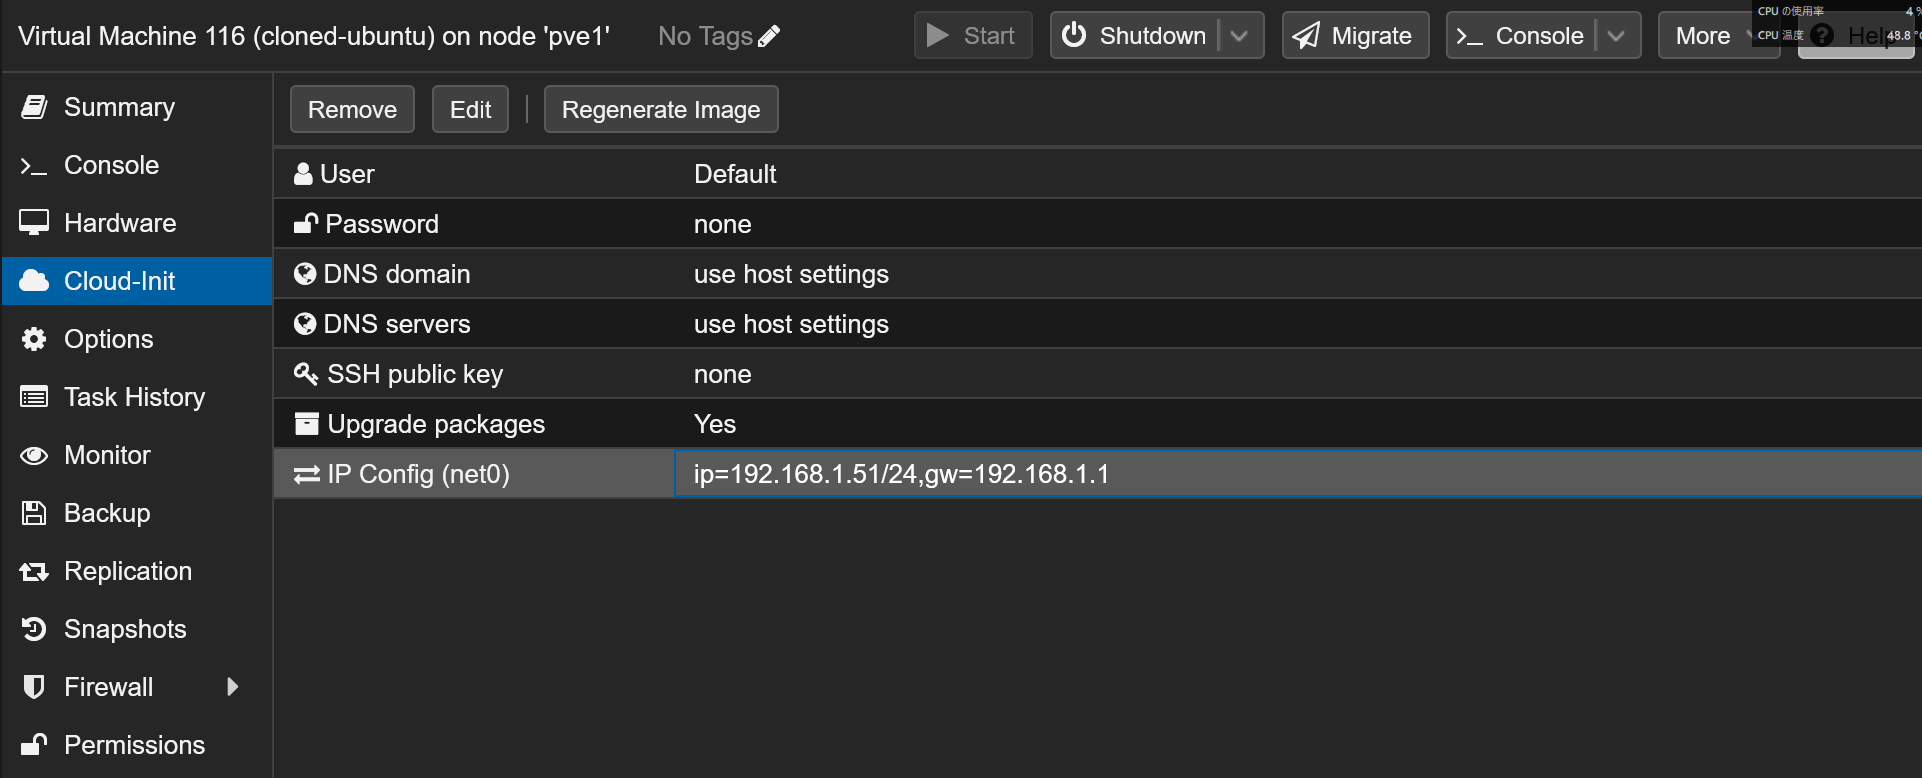
ID=9000サーバをCloneしてcloudinitを編集する。IPアドレスを変える。